
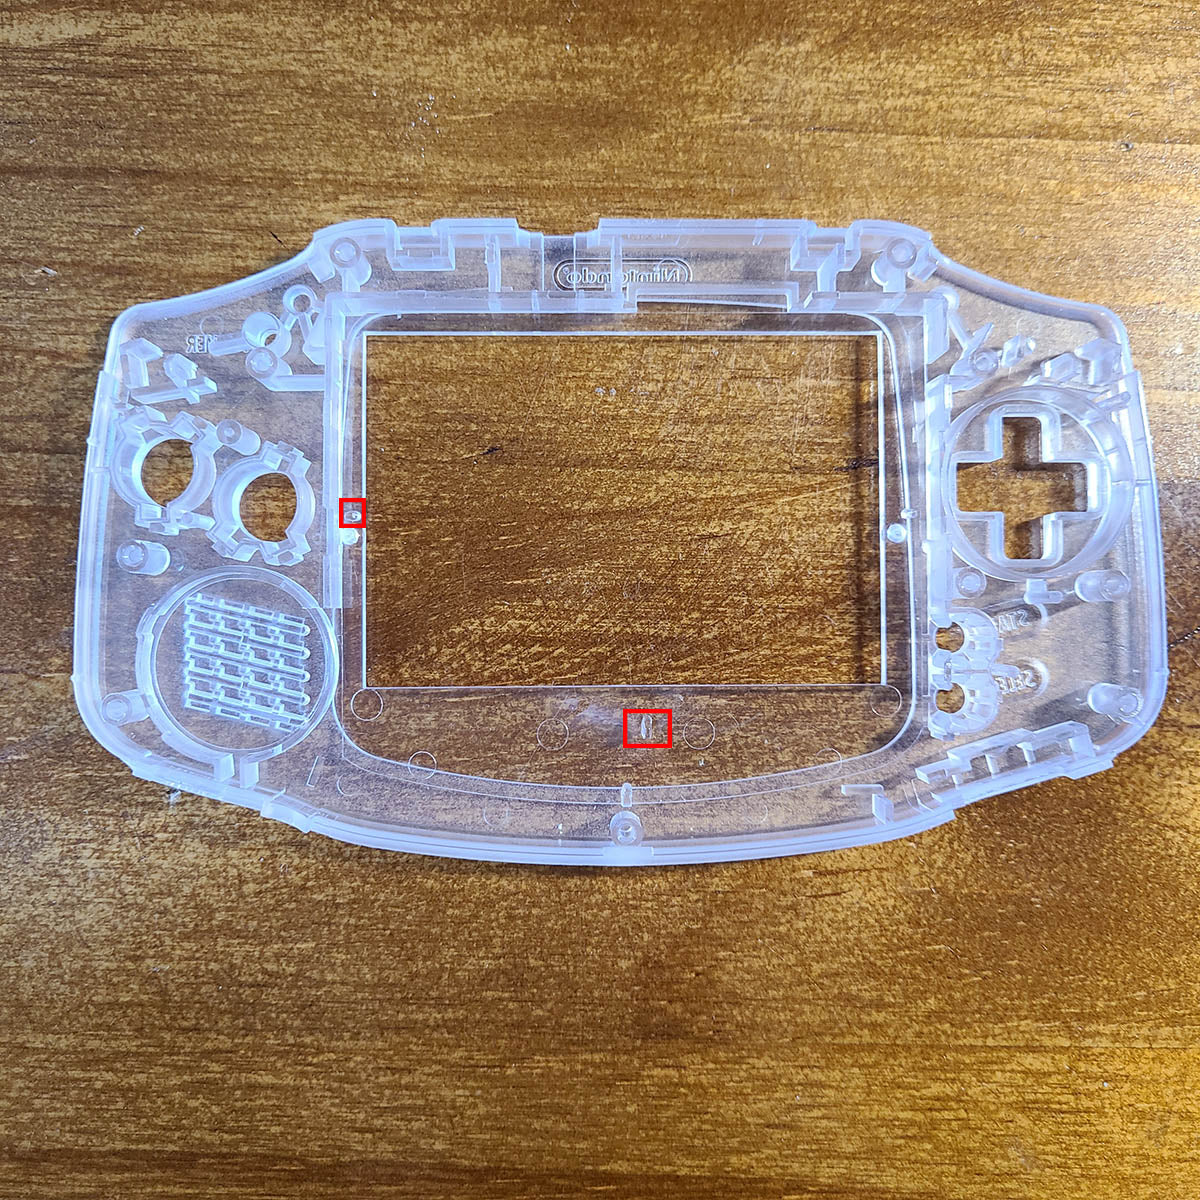
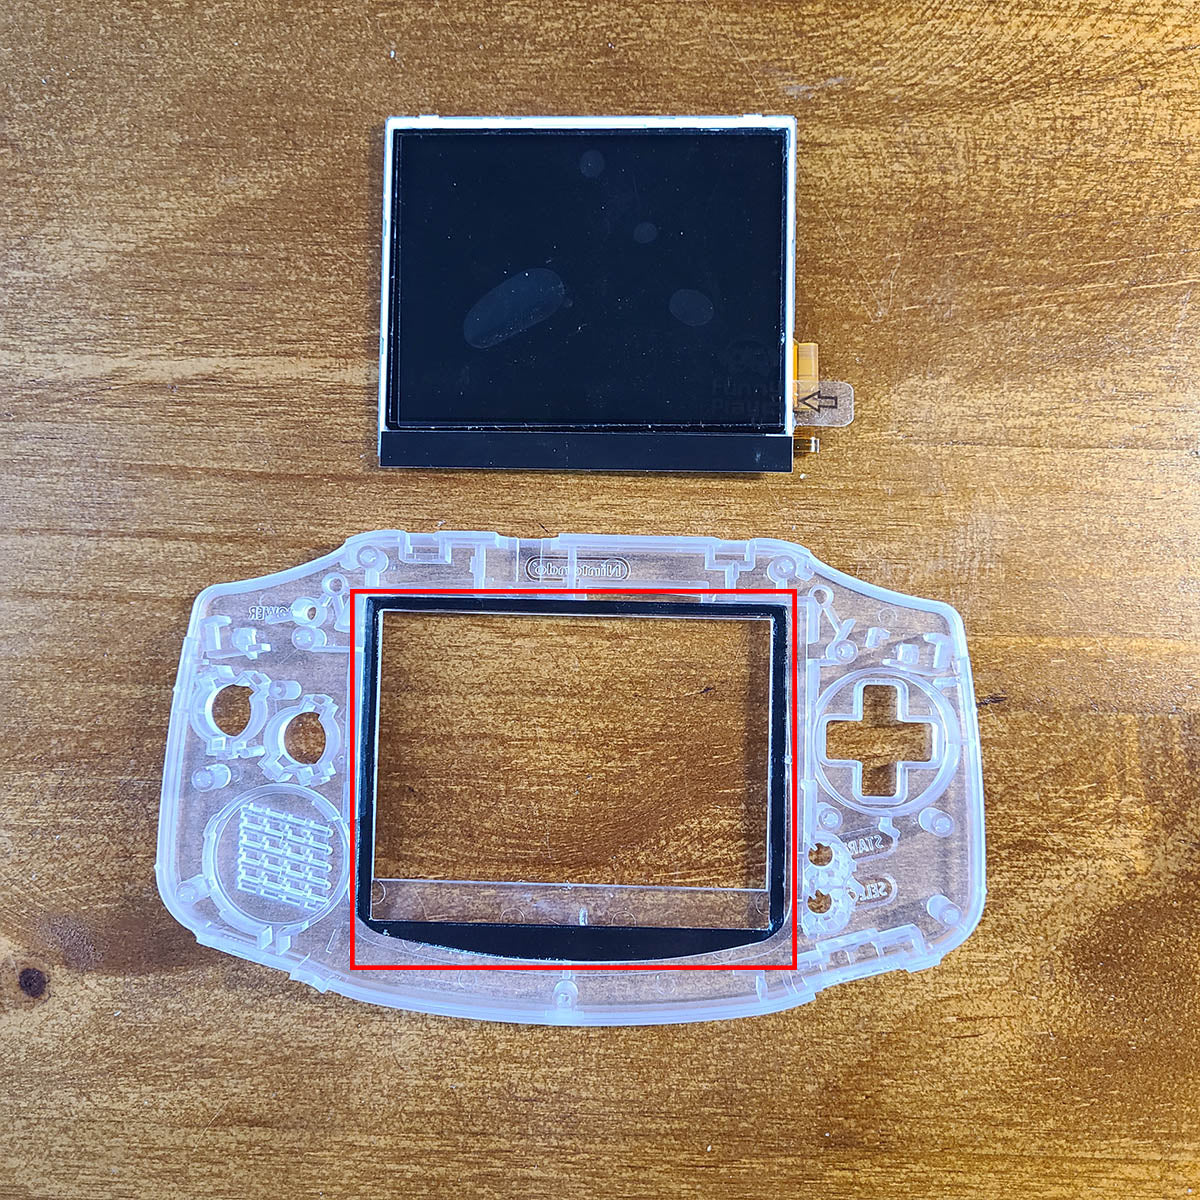
2.It is recommended to use the ITA/IPS shell minus the IPS fixed point in the red box to fit the ITA panel.
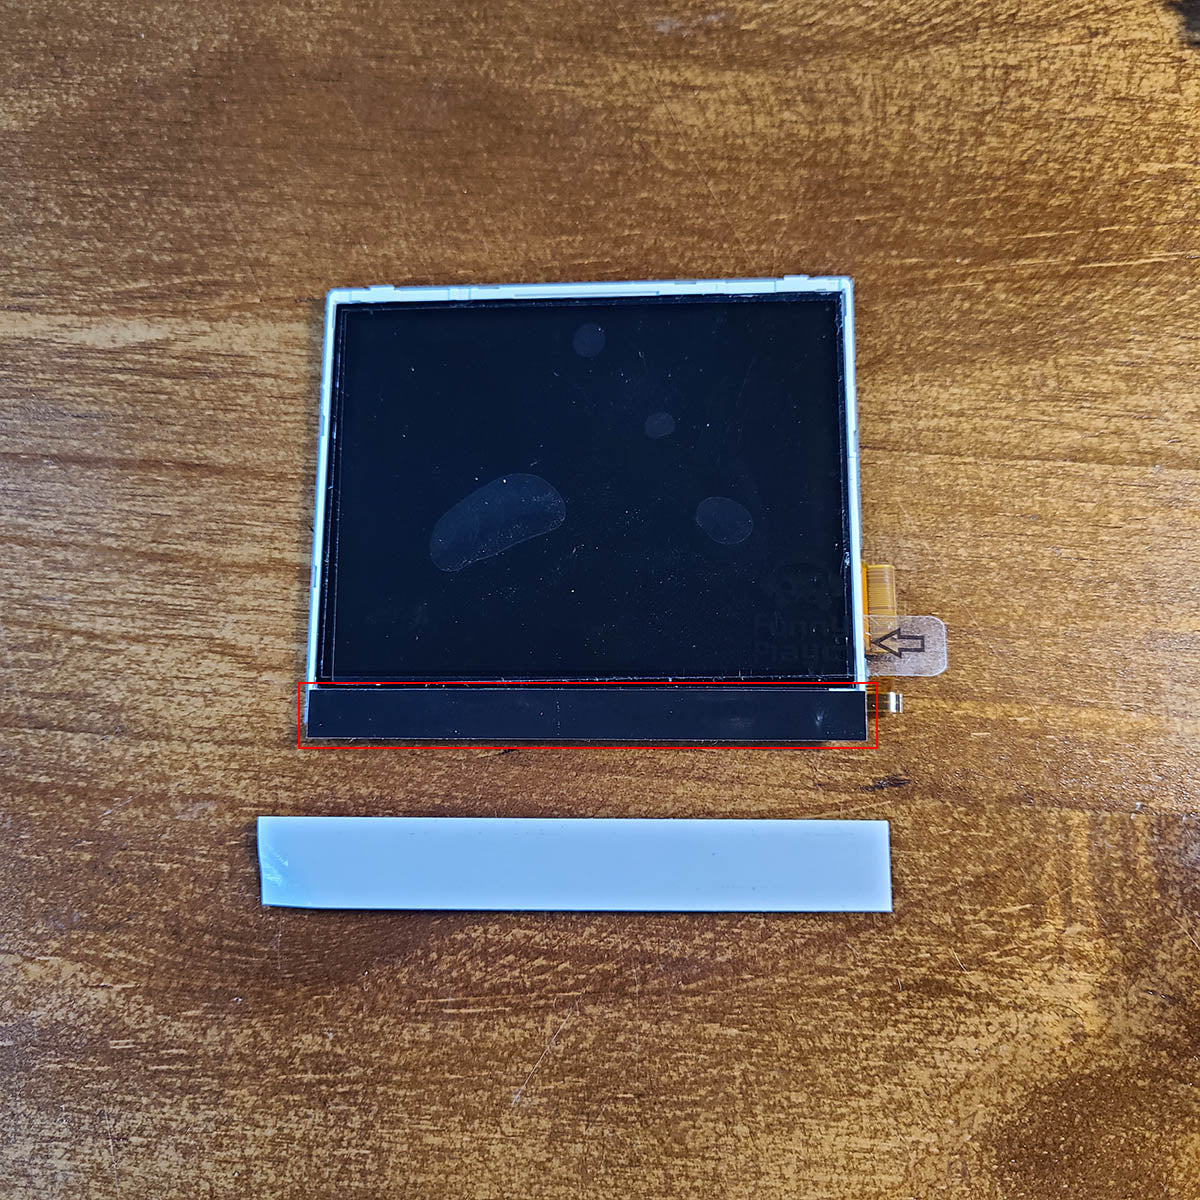
3.Place shading paper at the bottom of the panel (skip this step if it is not a clear shell) Optional
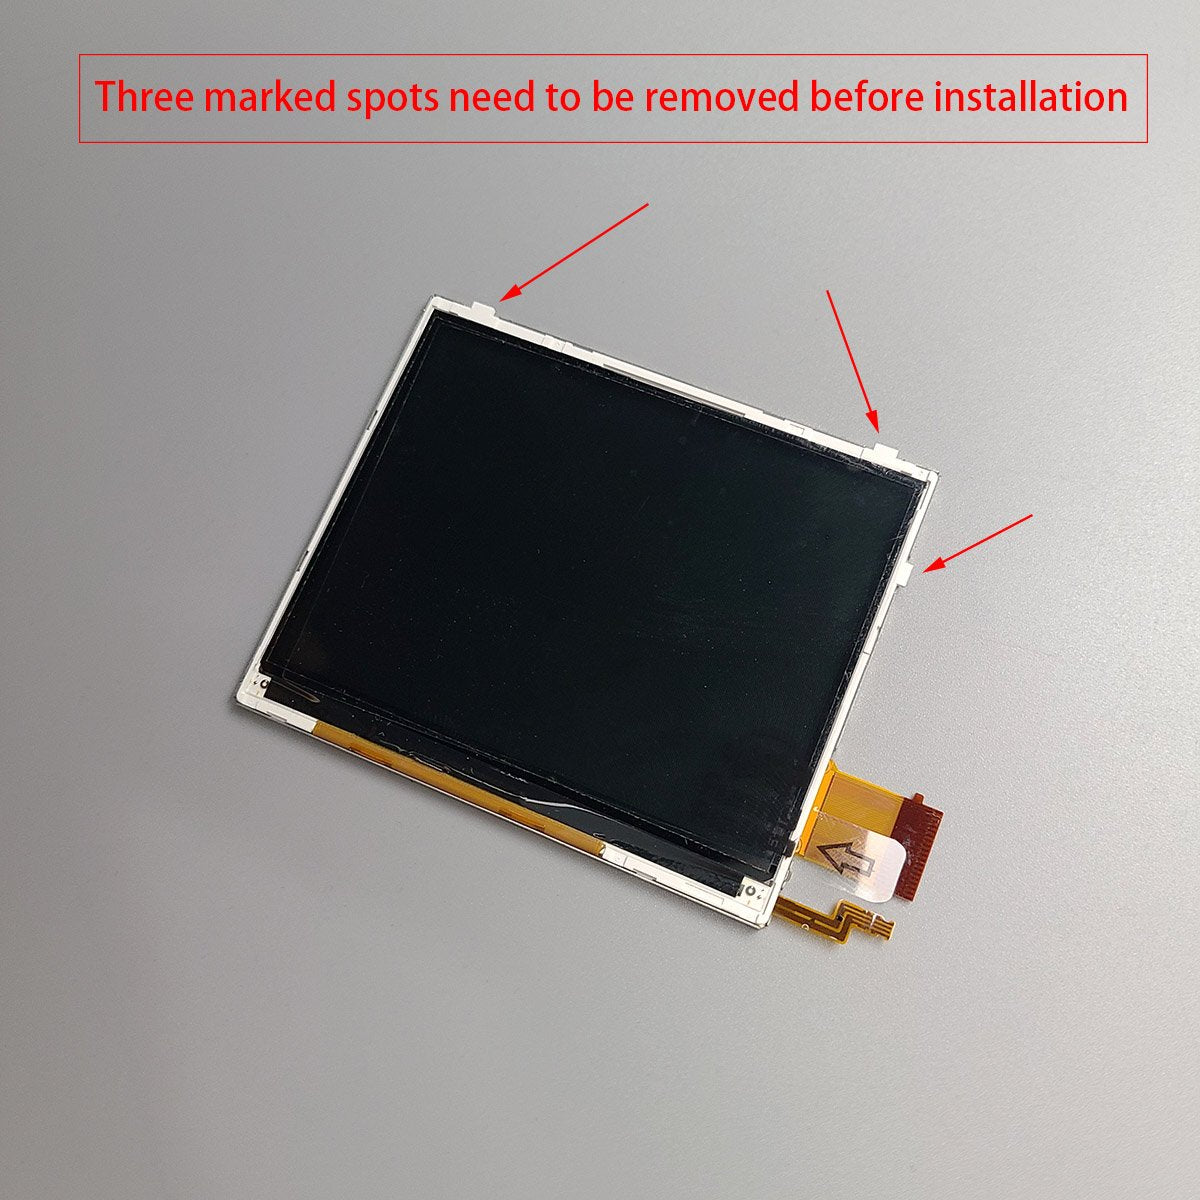
4.Scissors 3 plastic supports on the panel (this is the buckle of the NDSI panel, if not cut it will affect the installation)
5.Attach 3M tape to the front shell to secure the panel.
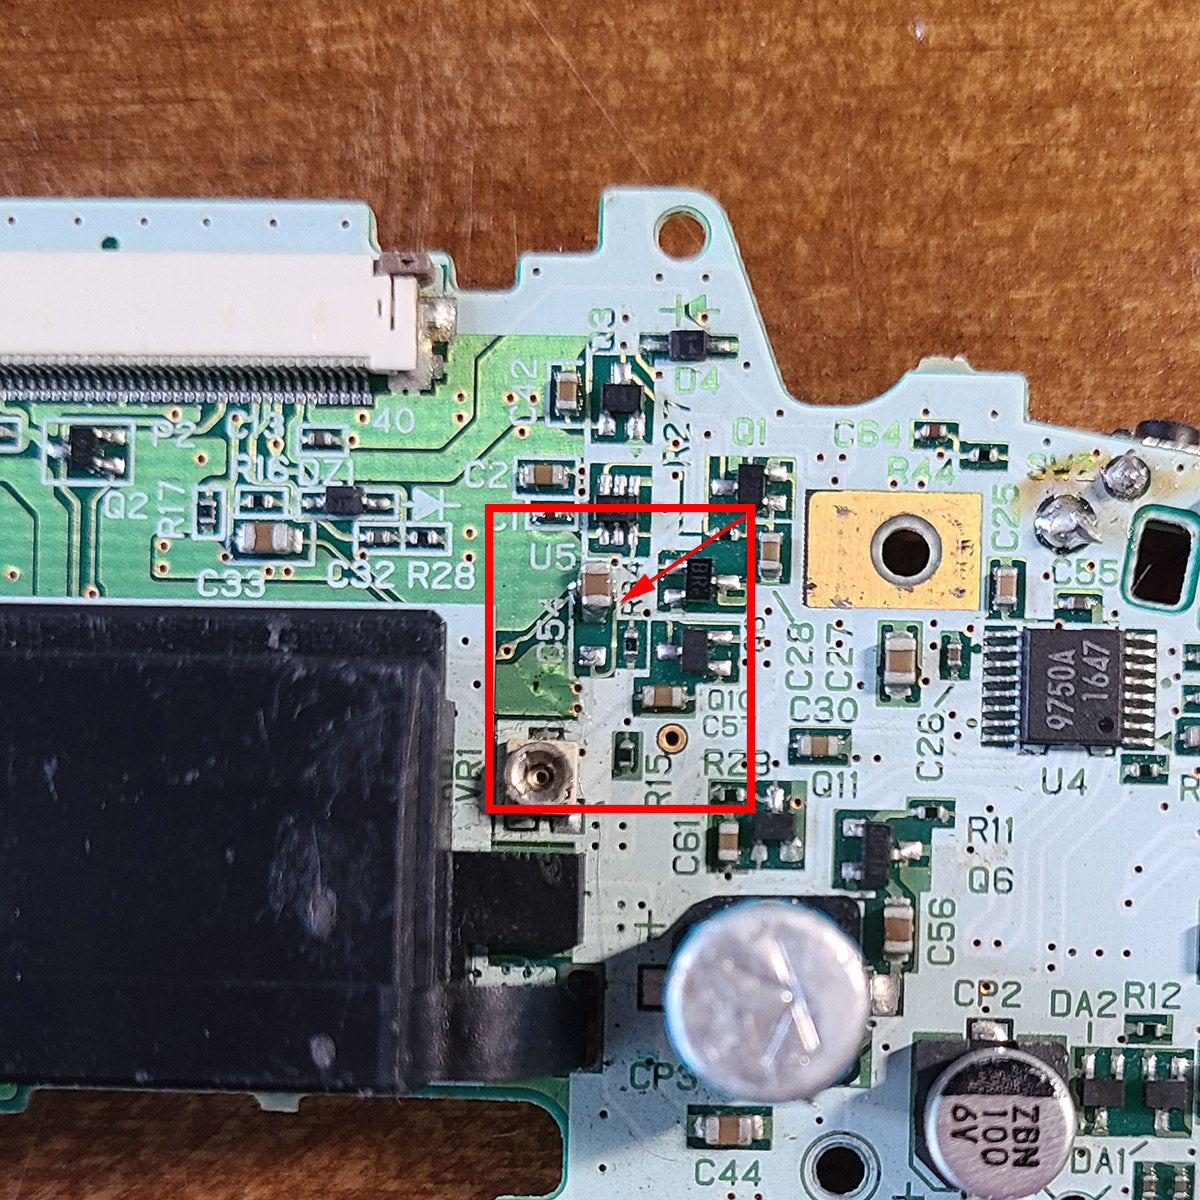
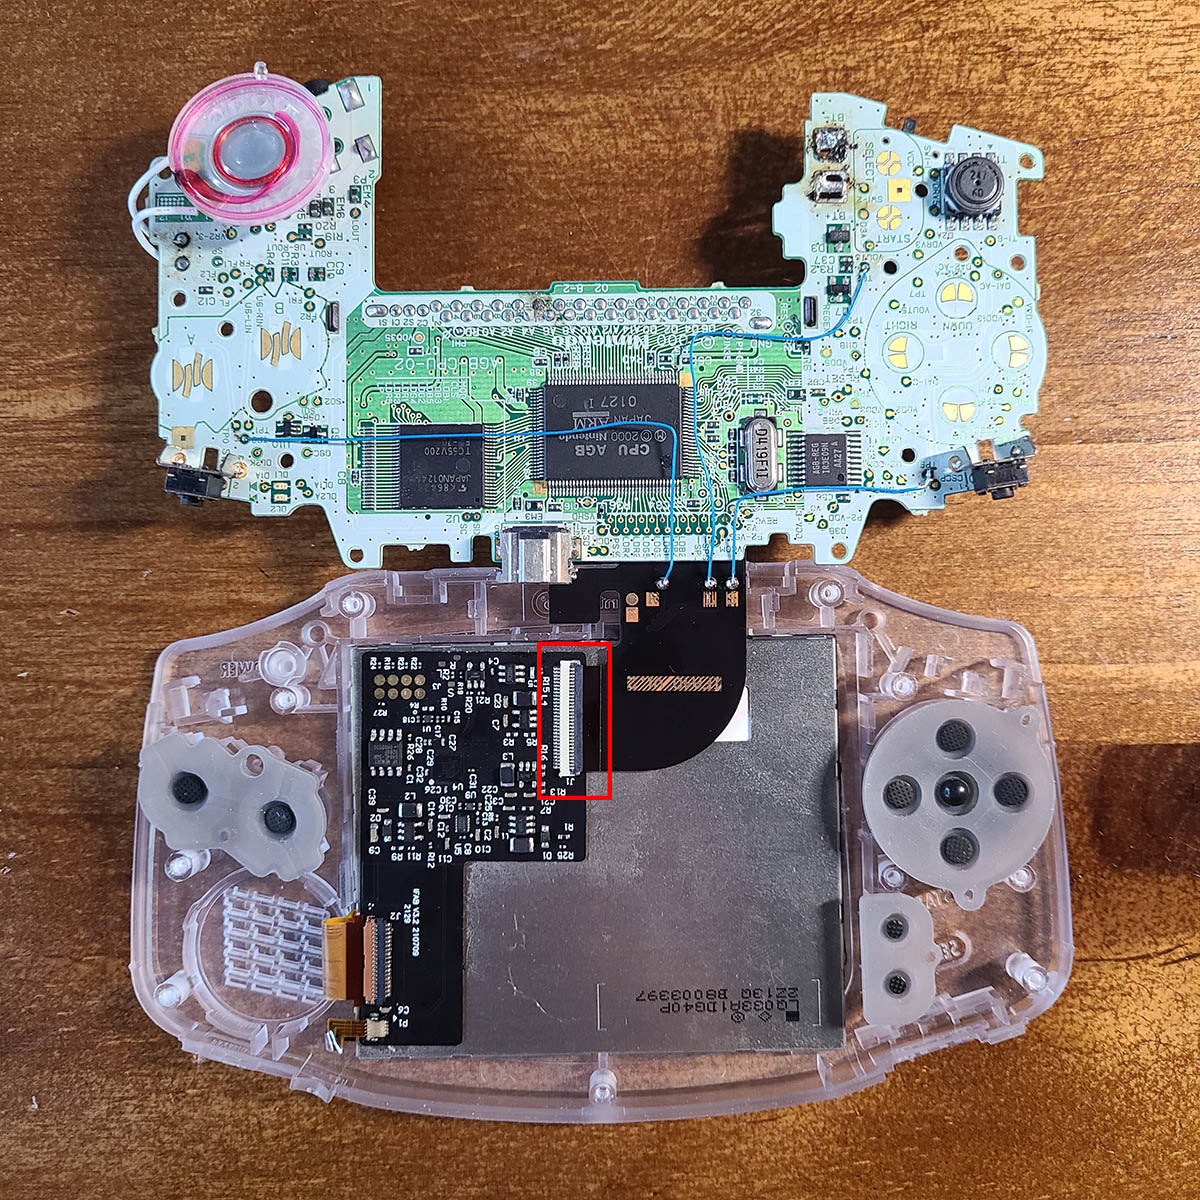
6.Take the 40PIN motherboard as an example, remove the C54 capacitor (32PIN motherboard can omit this step) Optional
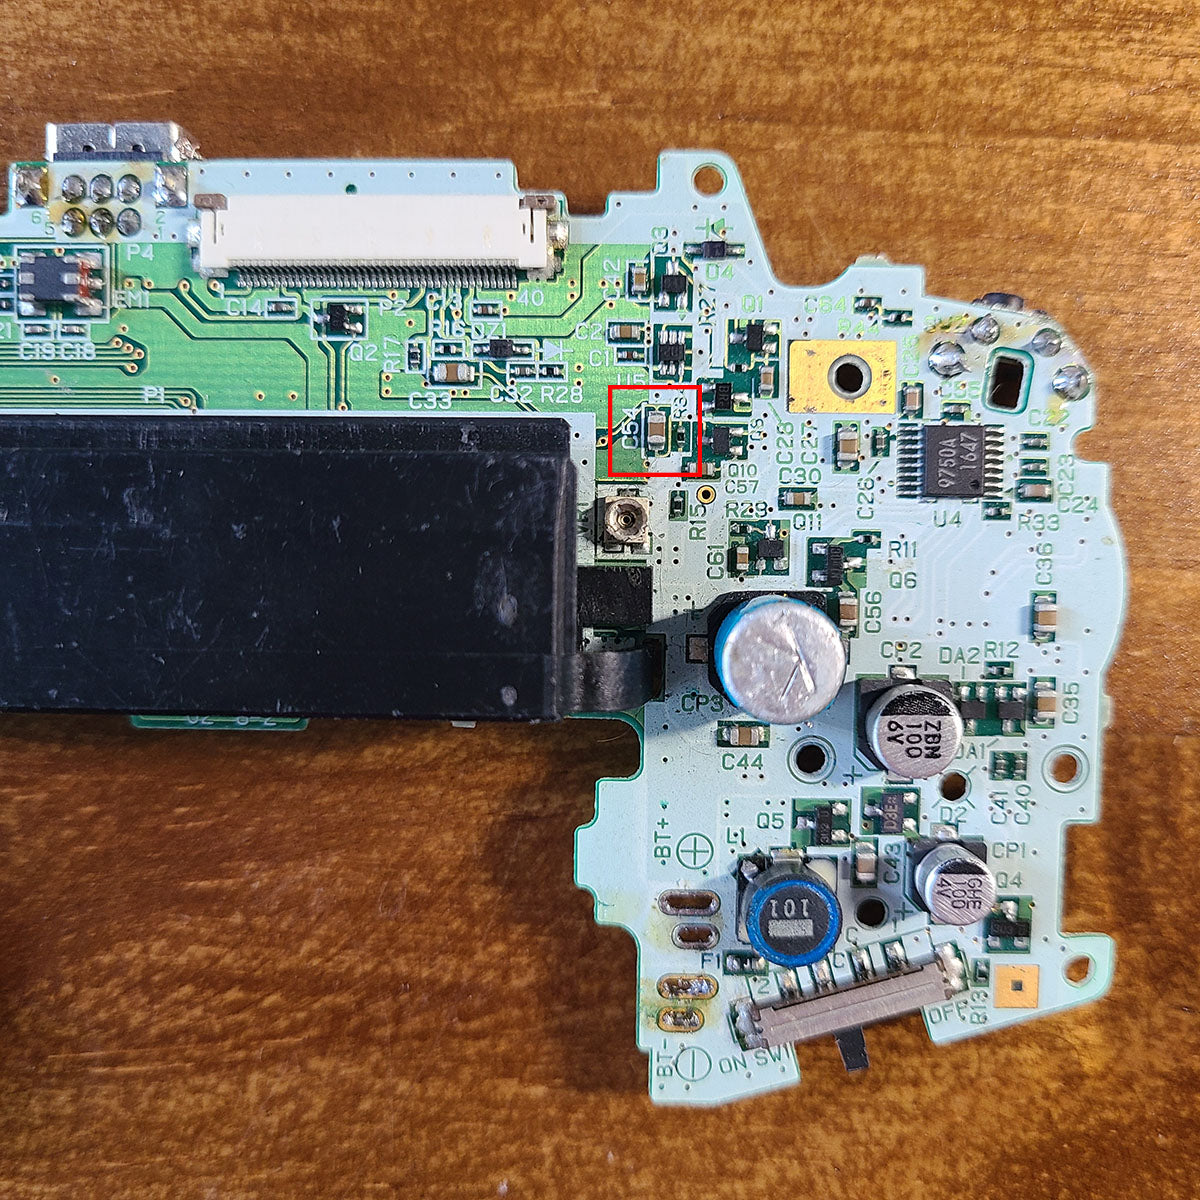
7.You can refer to the soldering method in the picture, only solder one point of the capacitor on the motherboard, this capacitor will not work, just to keep this capacitor for backup. Optional
8.Solder the TP8 TP9 TP2 on the main board to the small ribbon (you can or combine the brightness adjustment and position adjustment functions of the buttons after soldering, of course, if you don't use these functions, you can omit them) Optional
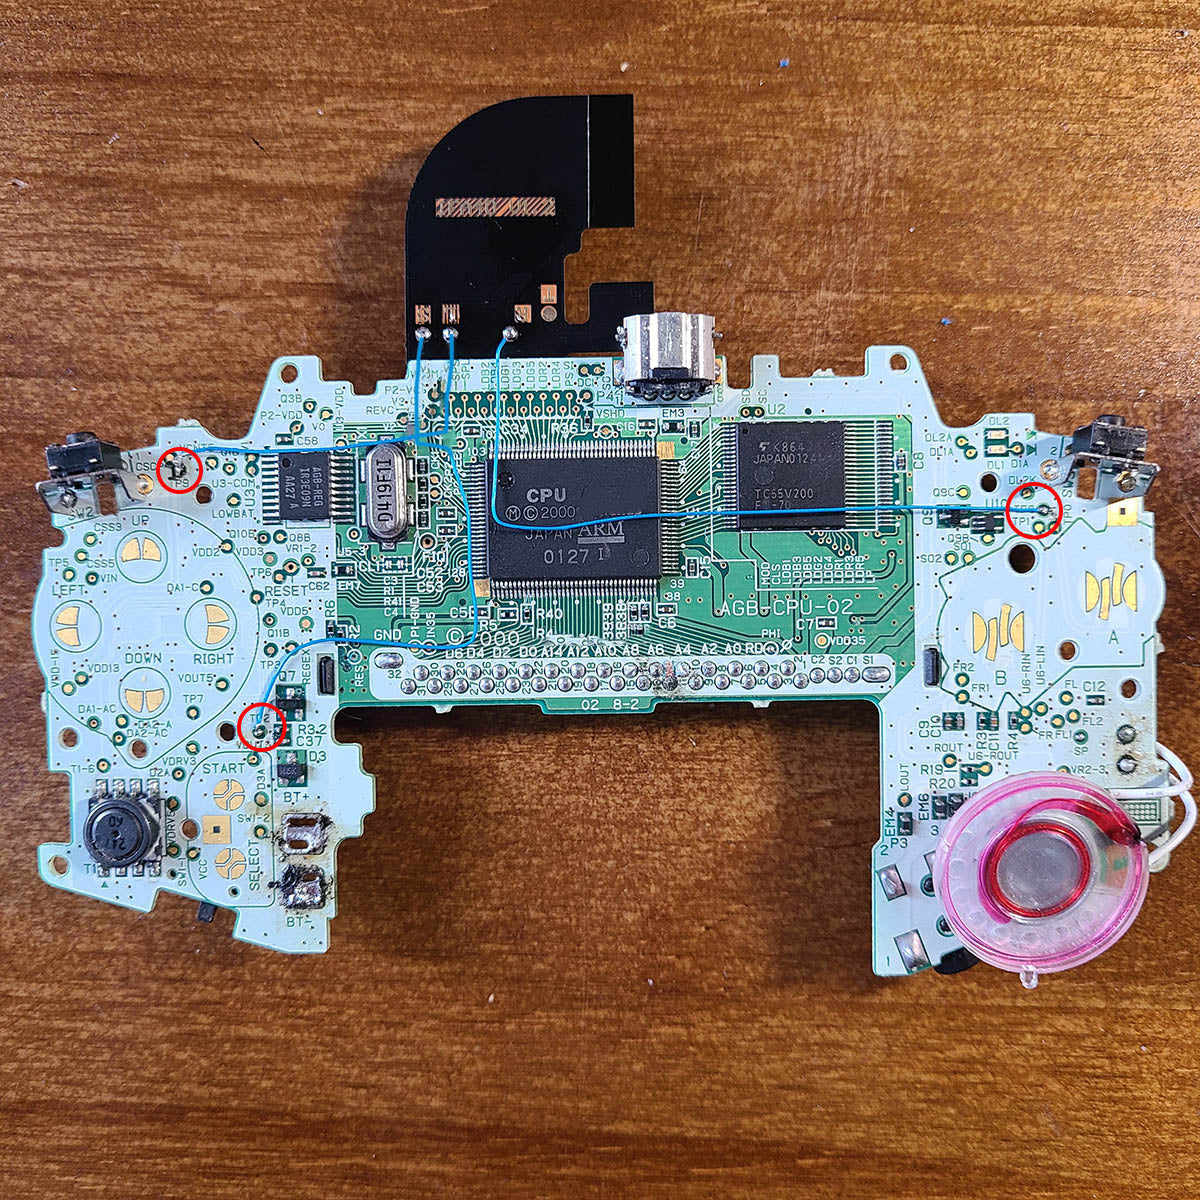
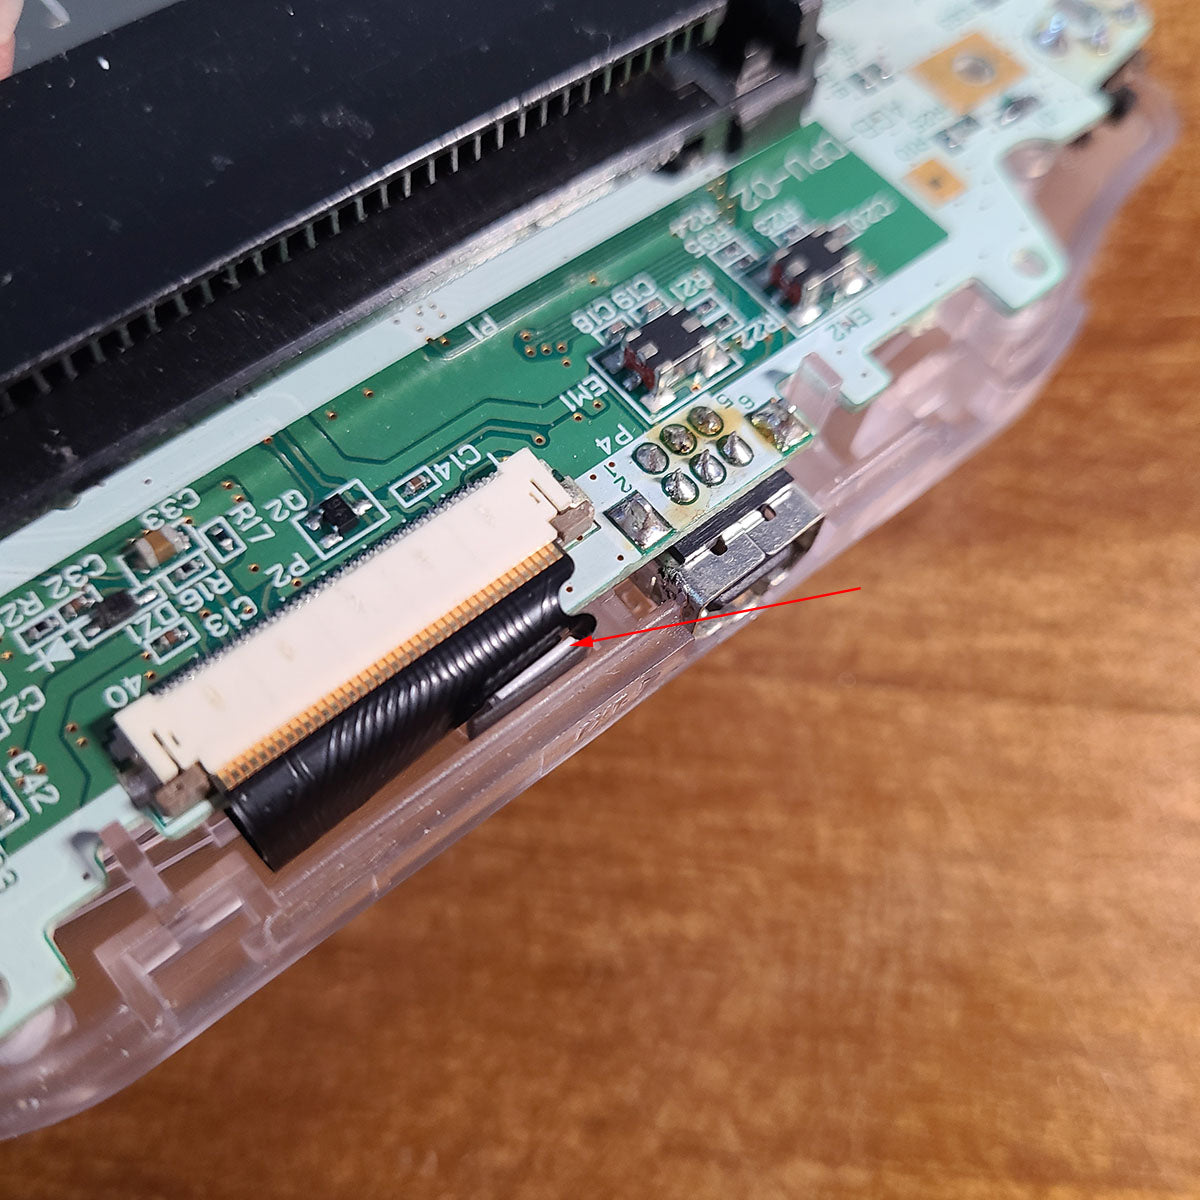
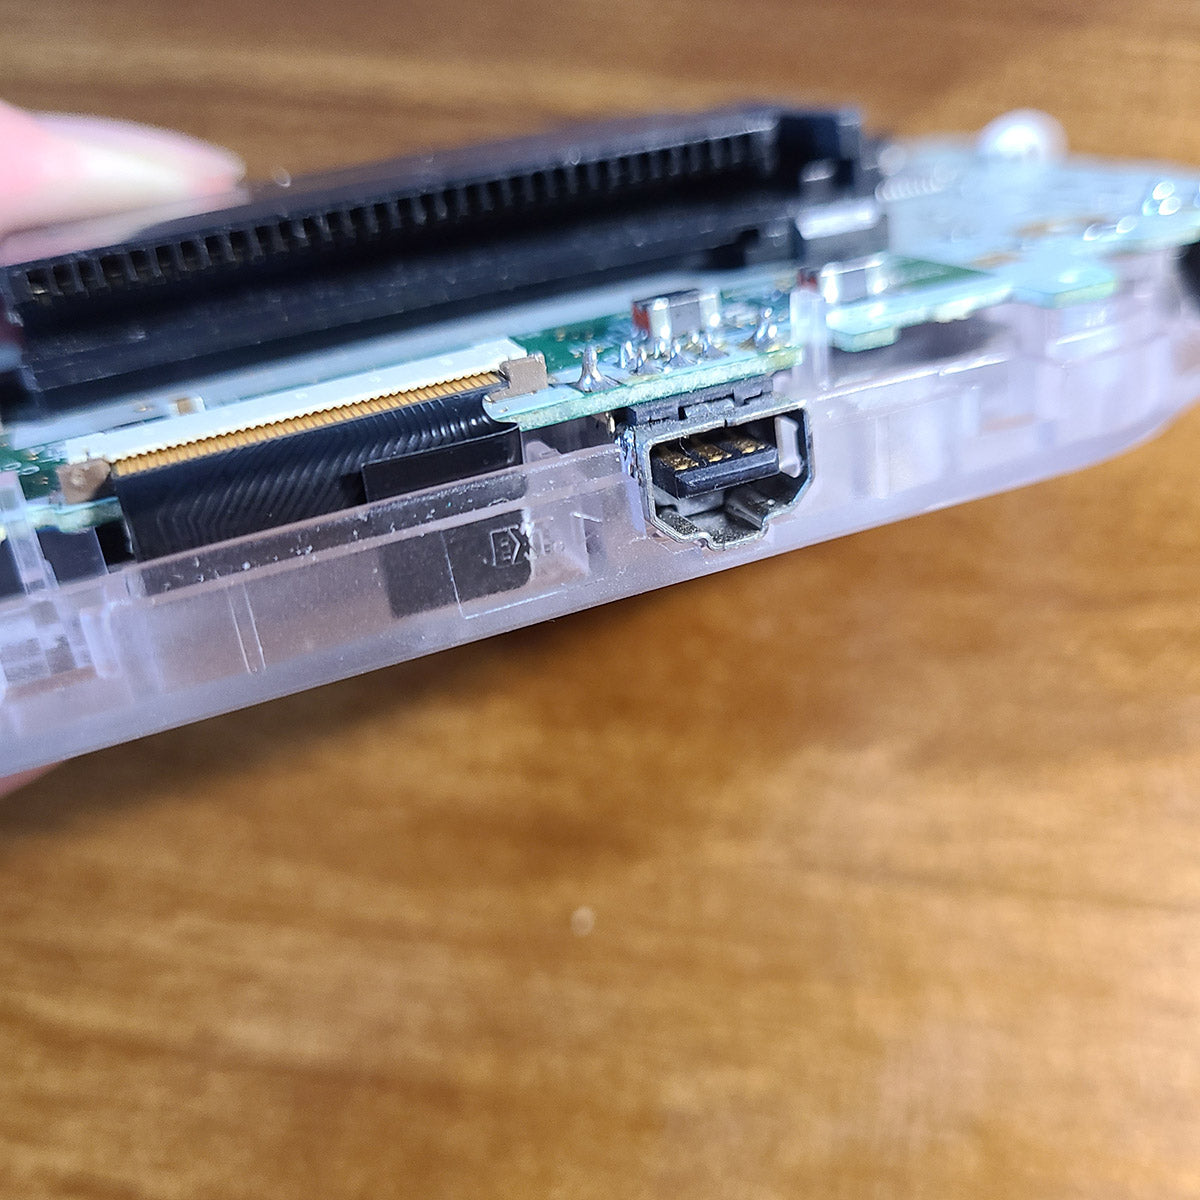
9.Connect the small ribbon to the main ribbon.
10.Connect the small ribbon to the motherboard and place the touch pad to the correct position. You can refer to the picture to put a filler in the middle or stick the touch sheet directly on the shell.
11.Ensure that the touch pad is sufficiently close to the shell.
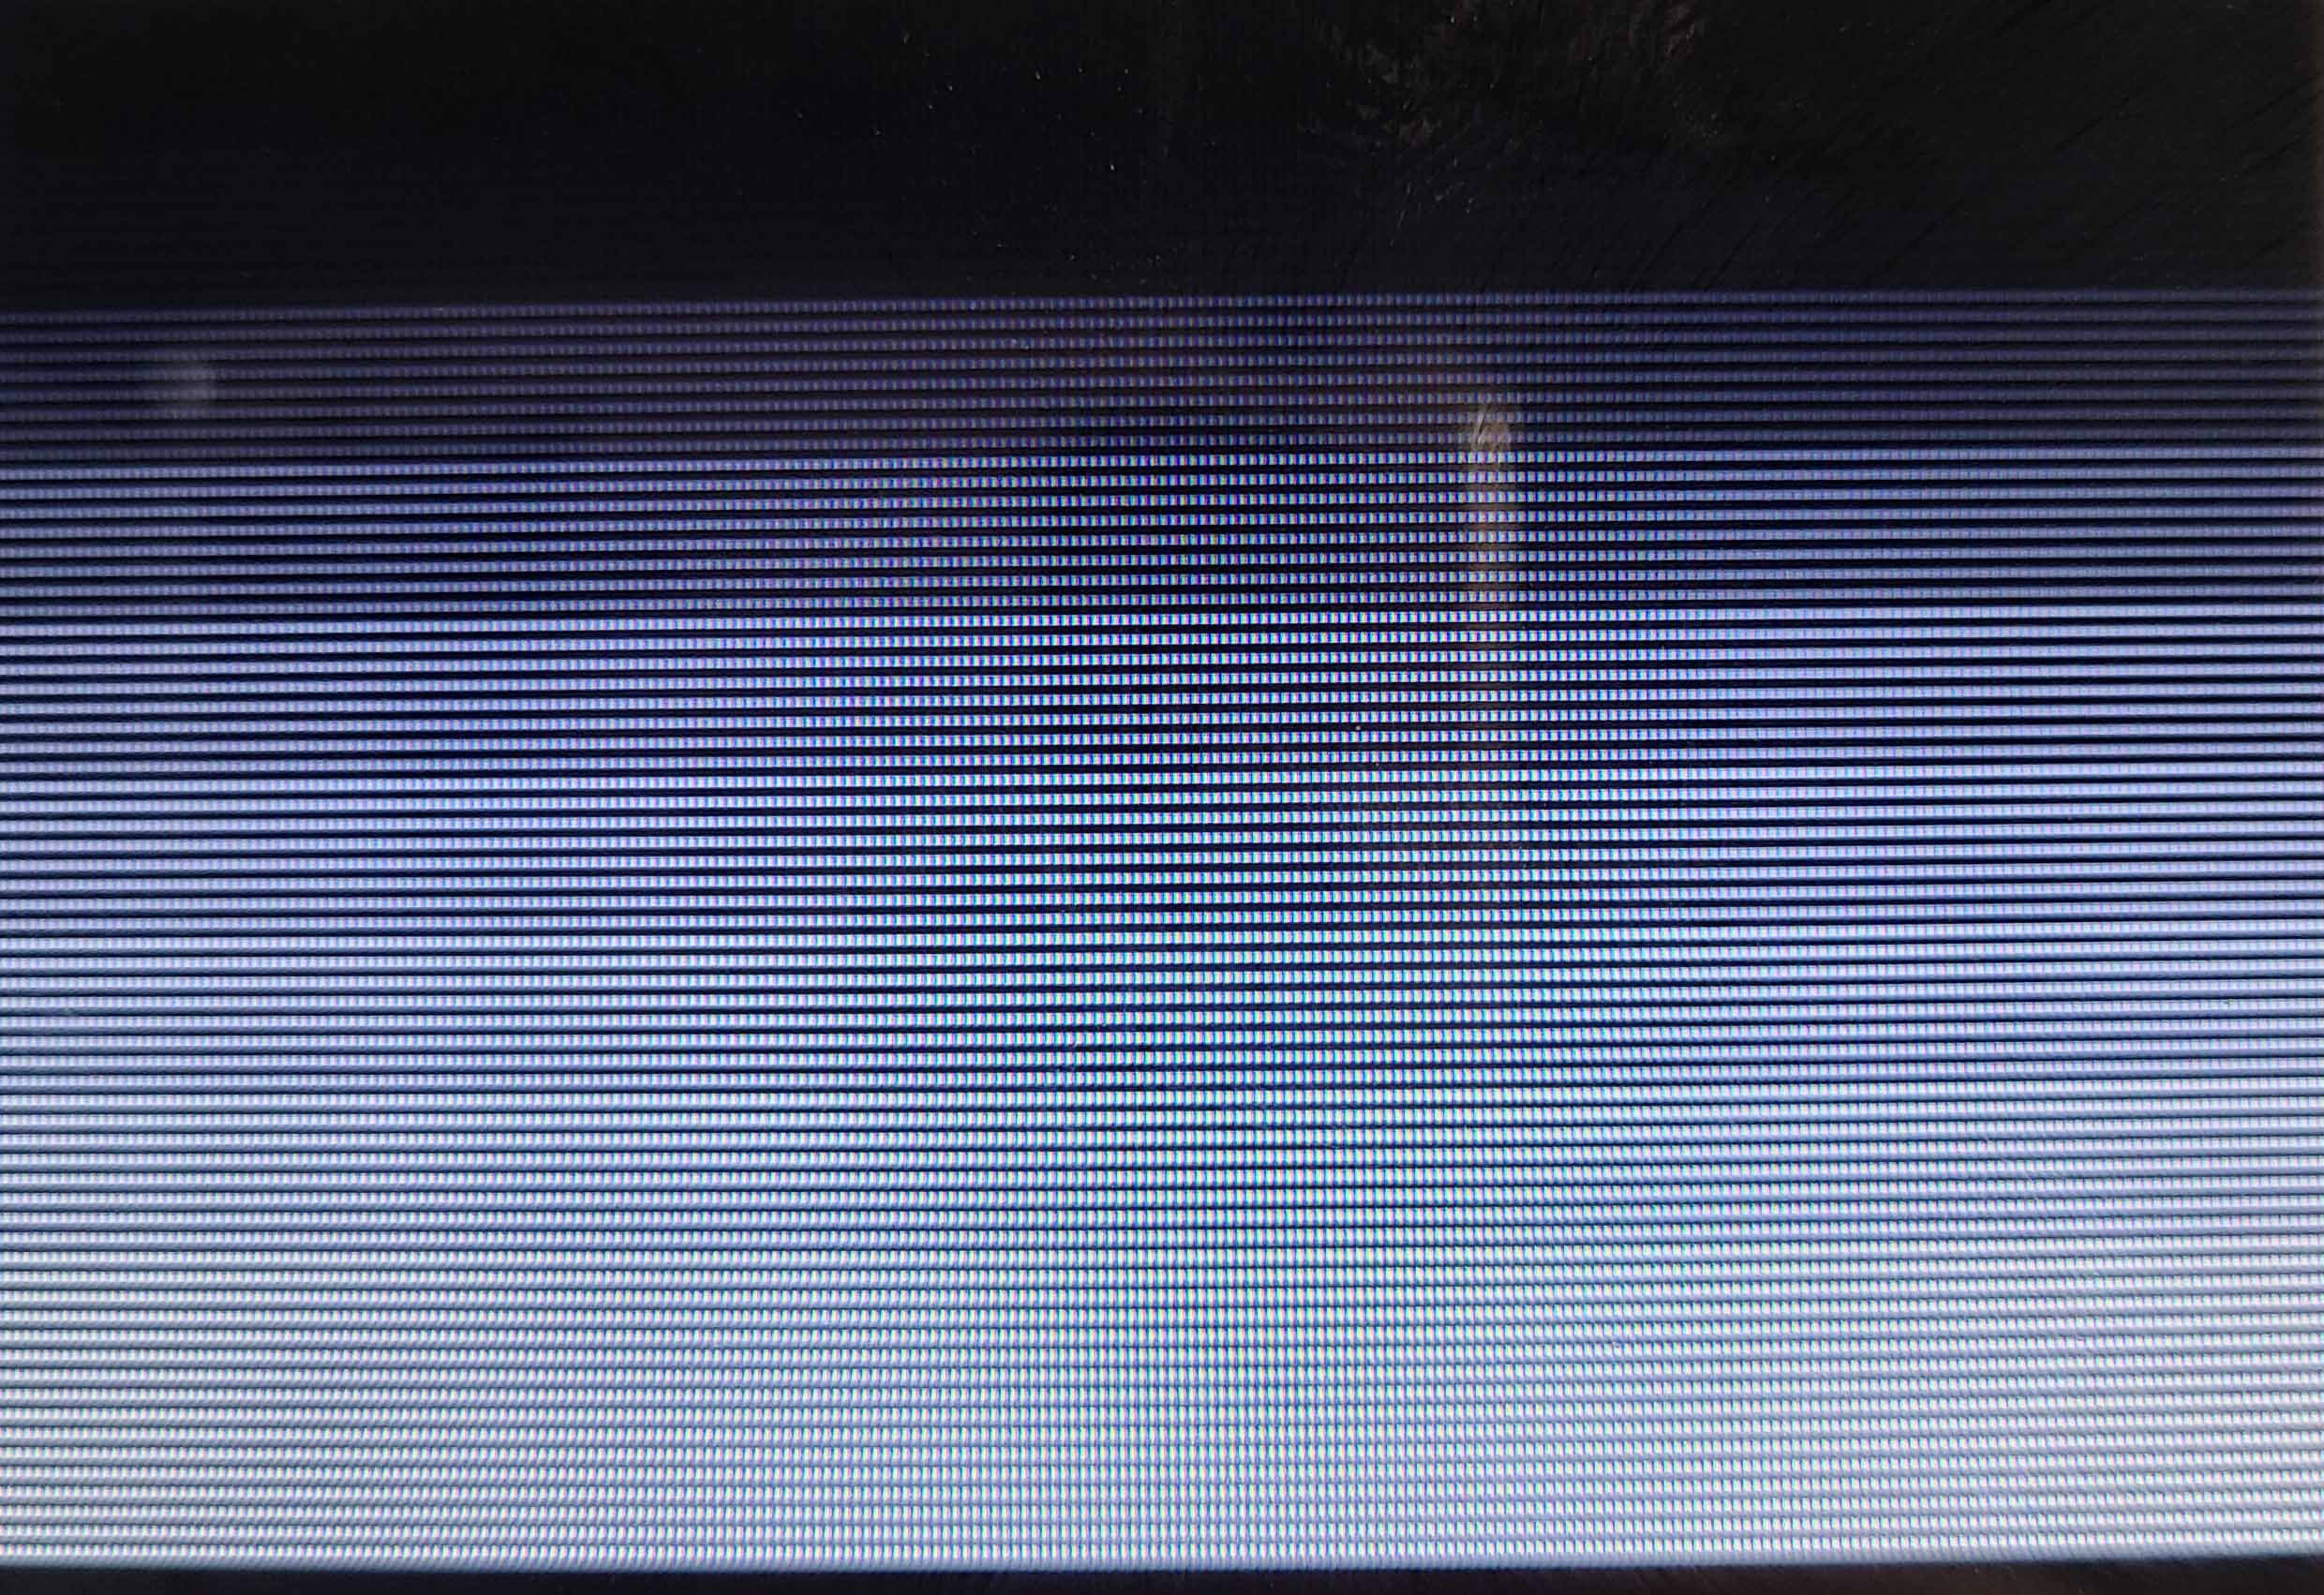
12.The principle of the ndsi panel is basically similar to that of the AGS101 panel, so you need to adjust the display to the best state after the installation is complete.
AGS Aging Cartridge
This is the best software I found to adjust the panel display. If you have a better way, please skip this step.
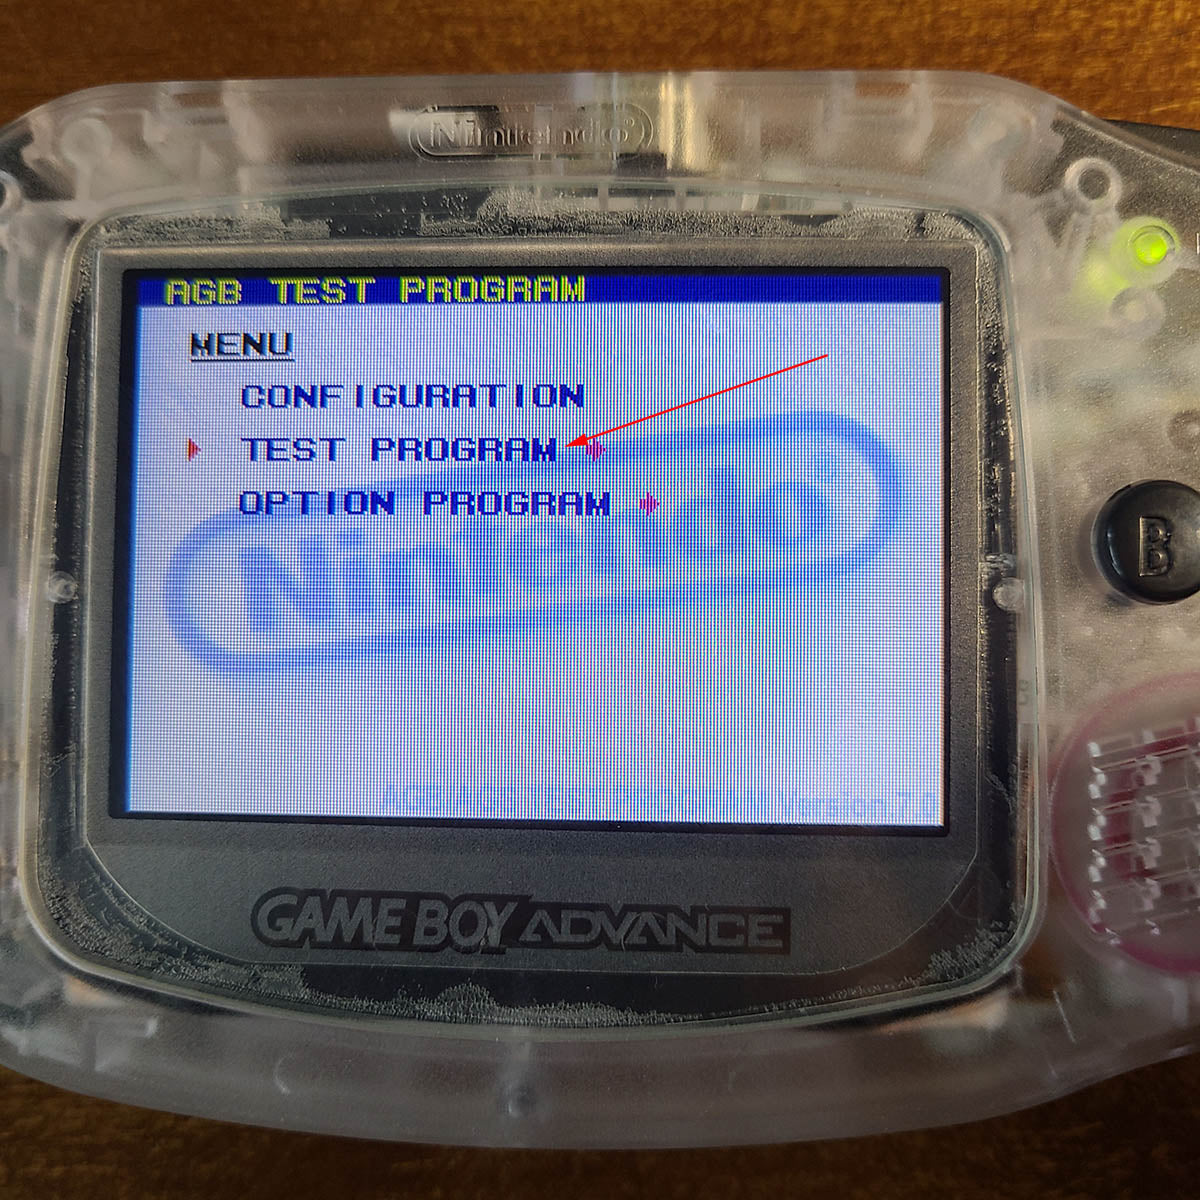
Enter LCD UNIT CHECKER
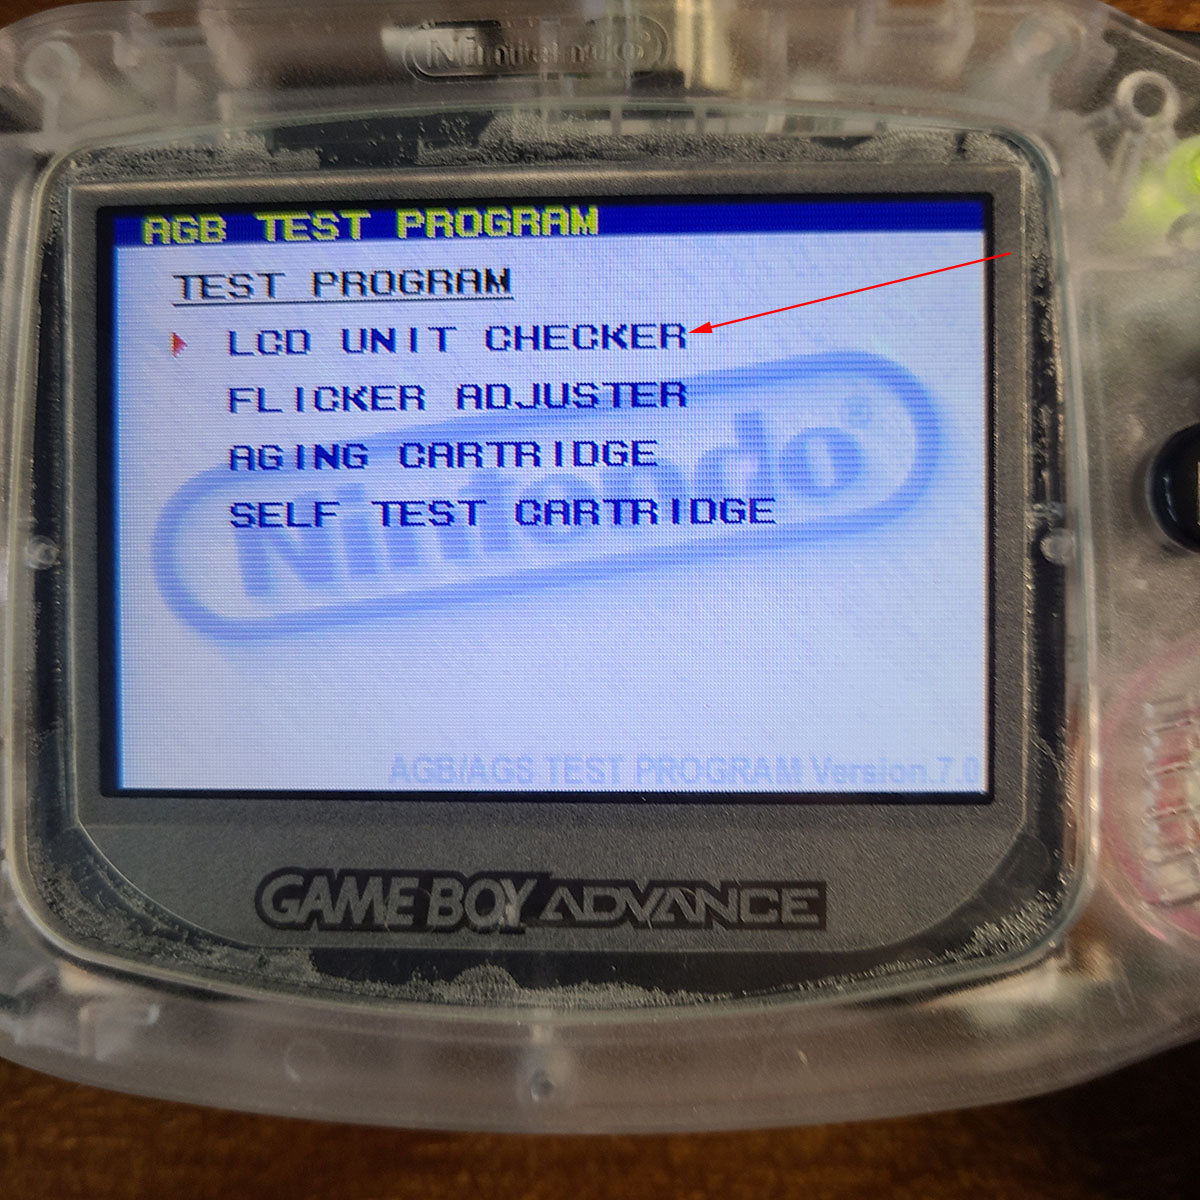
Adjust the resistance on the back of the motherboard until the panel display no longer flashes.
You can use a 1.5-3 type Phillips or flat-blade screwdriver.

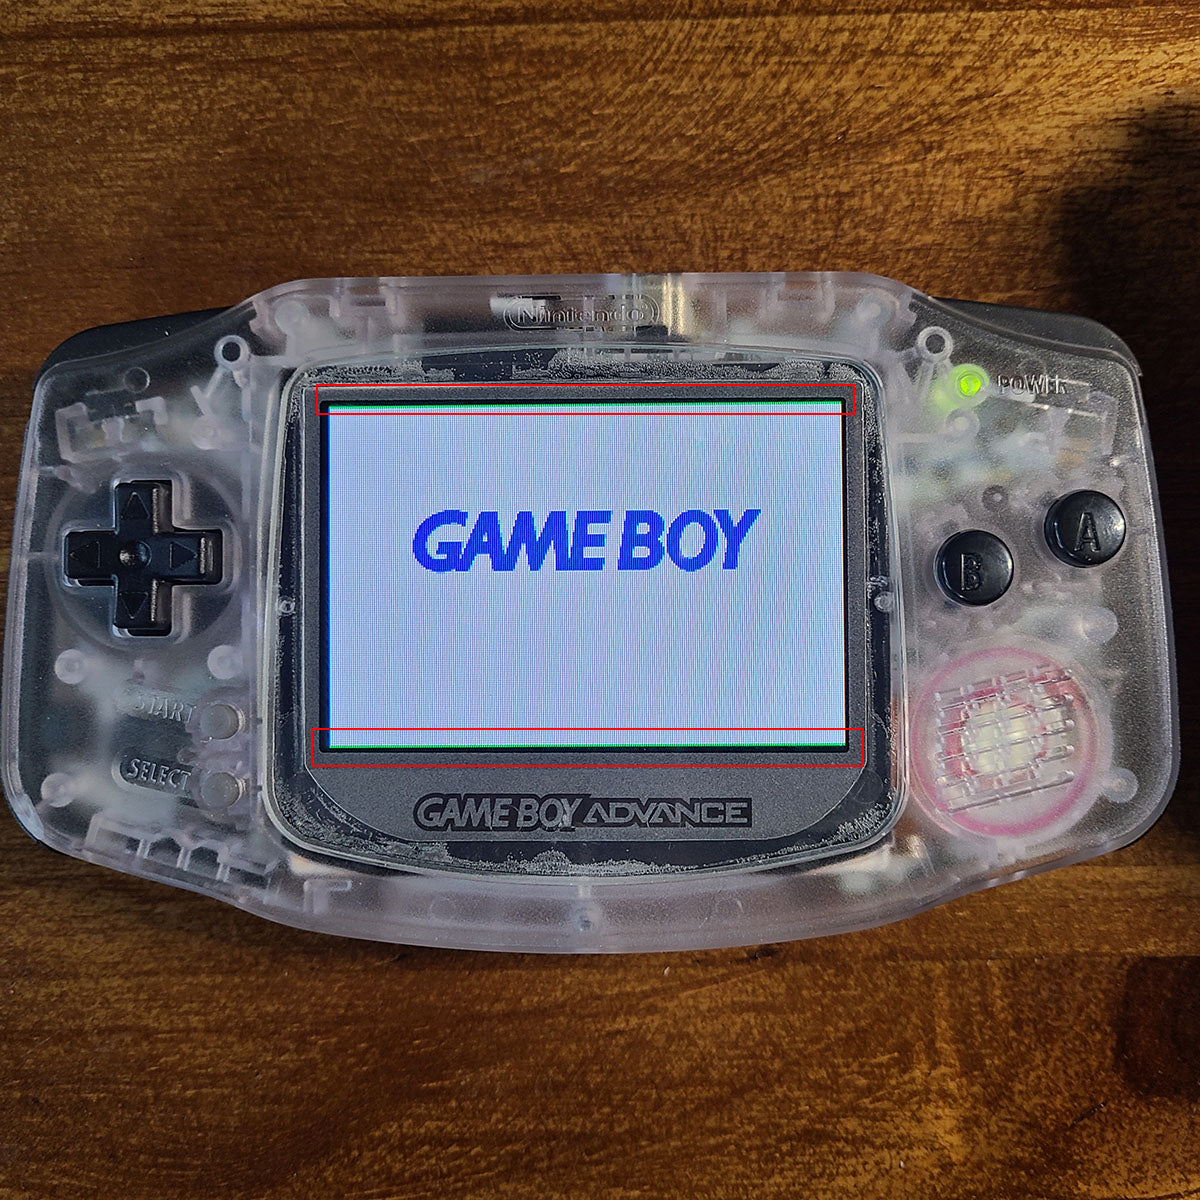
13.Press and hold the L R SELECT button at the same time for 3 seconds to turn on the position adjustment function. Optional
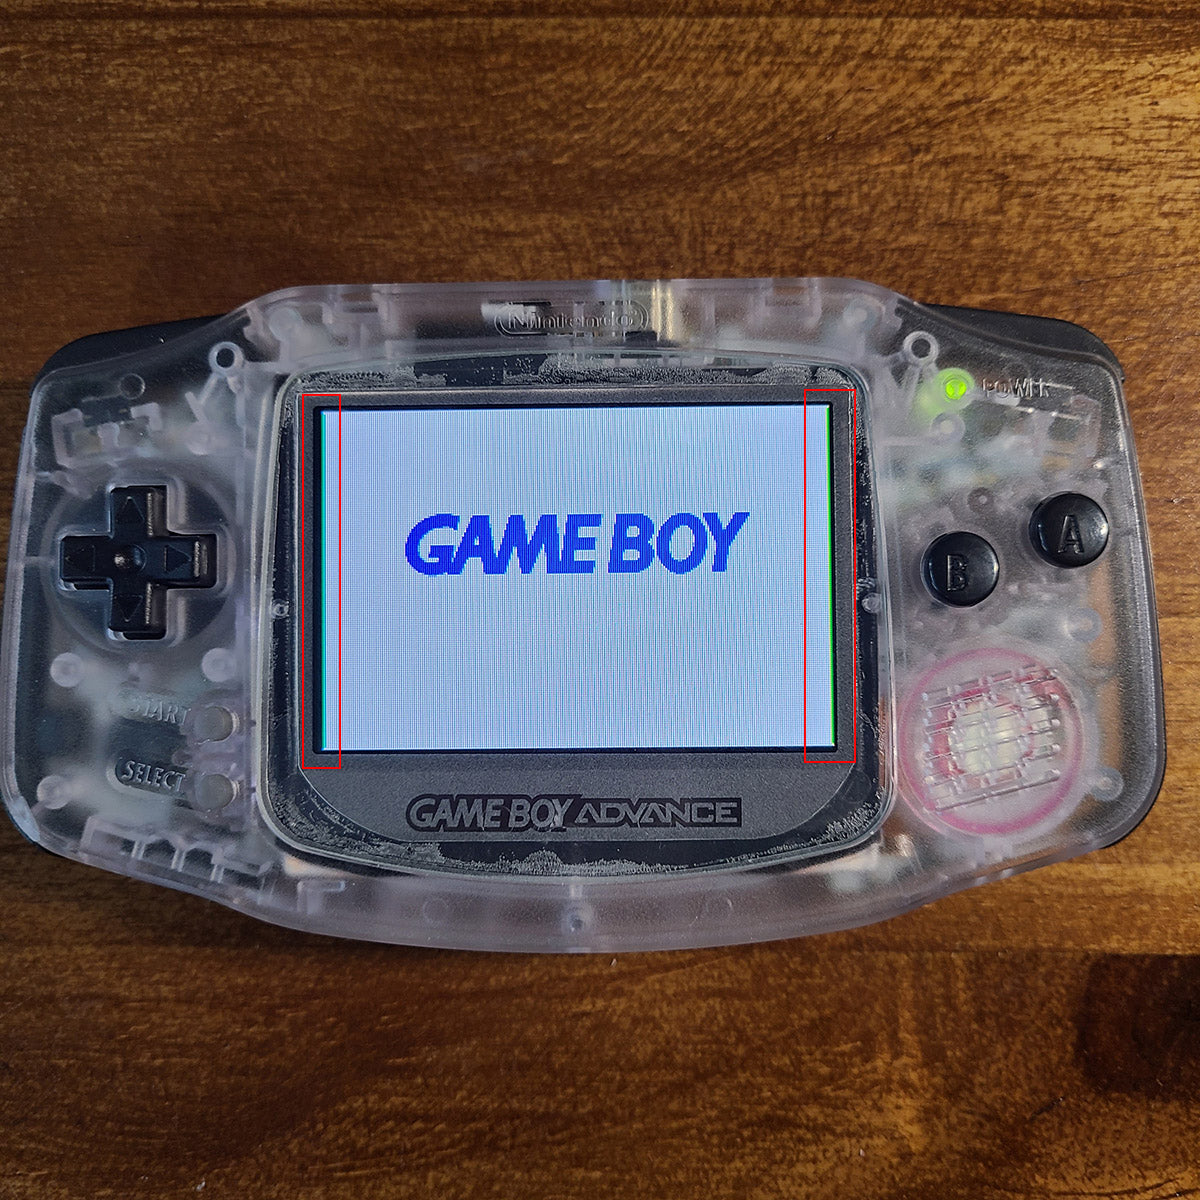
Press and hold for three seconds again to change the vertical position adjustment function.
1 comment
Great tutorial! Please check the picture in step 8, I believe it shows the wires for L and Select exchanged.